
This tutorial will teach you how to sign up for roles on the Trello scheduler. By the end of this tutorial, you will be ready to take full control of your Toastmasters Awards Track!
Step 1:
You should know how to get on Trello by now, having read the first 2 tutorials. Now, locate the Meeting Schedules board on the home page. If you are not at the home page, as seen in the image below (figure 1), simply click Boards in the top left, and from the drop down menu select Meeting Schedules.

figure 1
Step 2:
Now you are on the Meeting Schedules Board (figure 2).
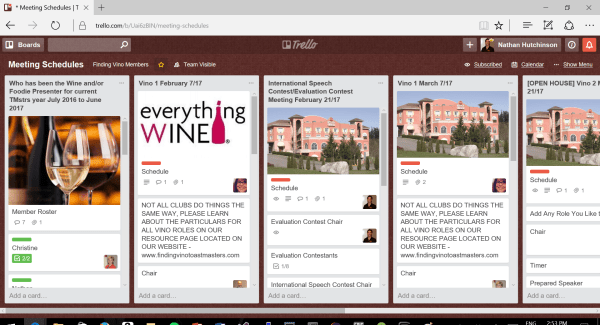
figure 2
If you notice on the far left (figure 3), we have our wine presenter list. Here, we keep track of all the wine presentations our members have done.

figure 3
As seen on figure 4, attached to each person’s name, there are three things to notice. A colored bar and a checklist (1,2). The green bar signifies that the member has done both a wine presentation, and a foodie (1). A yellow bar indicates that the member has done only one or the other (2). If the bar is red, that member has yet to present. This is the general format and color scheme Finding Vino uses to label cards on Trello.
The third thing attached to each card is a headshot, or profile picture (3). This connects that member with the card. The member will be notified of any information or comments made on that card. More on this later.

figure 4
Take a look at the rest of the lists on figure 5.
Each list represents a particular meeting.
The picture at the top of each list lets us know where the meting will be held. Everything Wine logo (1) if the meeting is held at Everything Wine. A picture of the Pink Palace (3) if the meeting is held at the Pacific Inn Resort.
The title on each card tells us which meeting it is. Vino 1, is our first meeting of the month, and Vino 2, is our second meeting of the month. Sometimes the title of the card will indicate a special event, like a speech contest (2) or an open house (4).
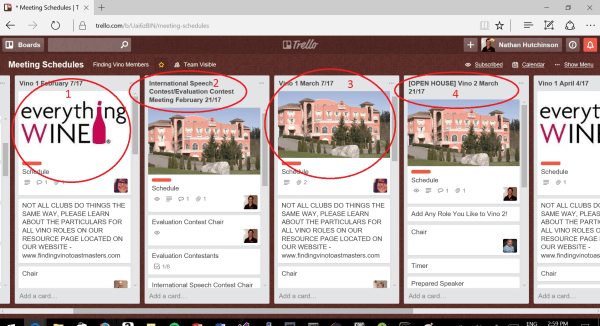
figure 5
If we look closely at the cards on a particular list (figure 6), we can get a feel for what will be taking place at that meeting. Each card in the list represents a role. At this particular meeting, Rob Weaver is taking on Chair (1), Riz Aseem will be doing a white wine presentation (2), and Vivien Ip is performing a prepared speech (3).
As you can see, all the roles are taken. Except one, the Ah-Counter! (4)
How about we sign ourselves up?

figure 6
Step 3:
Click the Ah-Counter Card, and you will be brought to what’s called, the “back of the card” (figure 7). There are plenty of things here to interact with, right now we are only concerned with signing up for a role.
First, connect your profile to the card by selecting Members (1).
(Notice the comment bar (2), this may come in handy later.)
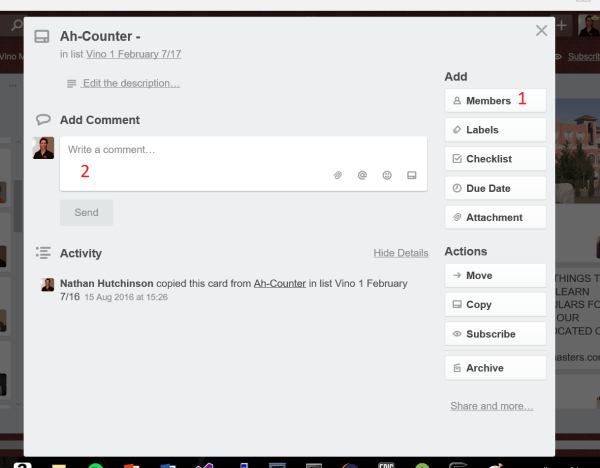
figure 7
Click on your profile picture, it should be easy to spot! (figure 8)
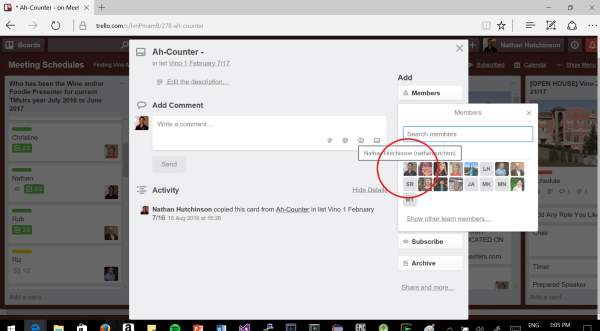
figure 8
After clicking your profile picture, you are connected to the card. (figure 9)
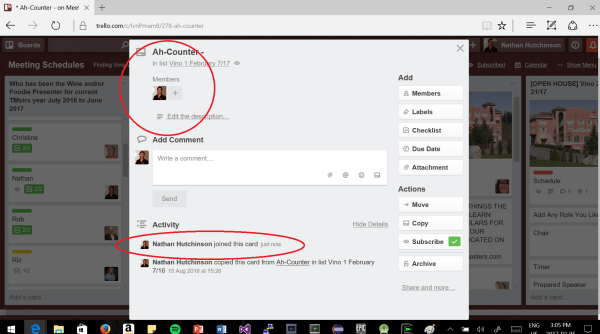
figure 9
Let’s look at figure 10. We may want to let someone know we’ve taken on the role. Or, maybe we have a question or concern, about the role, that we need addressed.
Trello provides a great place for communicating with other members, especially when it comes to concerns about specific items, such as roles.
If I had a comment or concern for Christine Steward, the best way to reach her is to @ tag her. This means use the @ symbol, and proceed to type her name (1). A list of members who’s name matches what your typing will pop up on the right (2) and you can simply click their profile.
Now if I typed a message, and pressed send, Christine would be notified on Trello, or via email (assuming she neglected to read my tutorial 2 on turning off notifications!), and on her mobile phone (if she has the Trello app installed). This means, Christine will be getting back to me in no time! How convenient!

figure 10
Step 4:
Click outside the back of the card to return the Meeting Schedules Board. And, viola! You’ve signed yourself up for a role, in 4 easy steps! Now, was that so bad? (figure 11)

figure 11
That’s all there is to it. But, we signed up for a role, what about signing up for a speaking spot? Well, its pretty much the same deal, except a little extra care is needed.
Let’s look at what’s going on at this meeting (figure 12). I think I see someone has signed up for Speaker 1.

figure 12
Wow, it looks like TWO people have signed up (figure 13). And this meeting is nearly 3 months away. GJ!
But, it appears neither of these two trouble makers filled out any details. That’s okay, they are planning way ahead, after all. They both have tons of time. But, let’s go ahead and finish Bev’s sign up. I took the liberty of getting her information (this is what the Chair will have to do, that’s why it’s important to fill out our details).
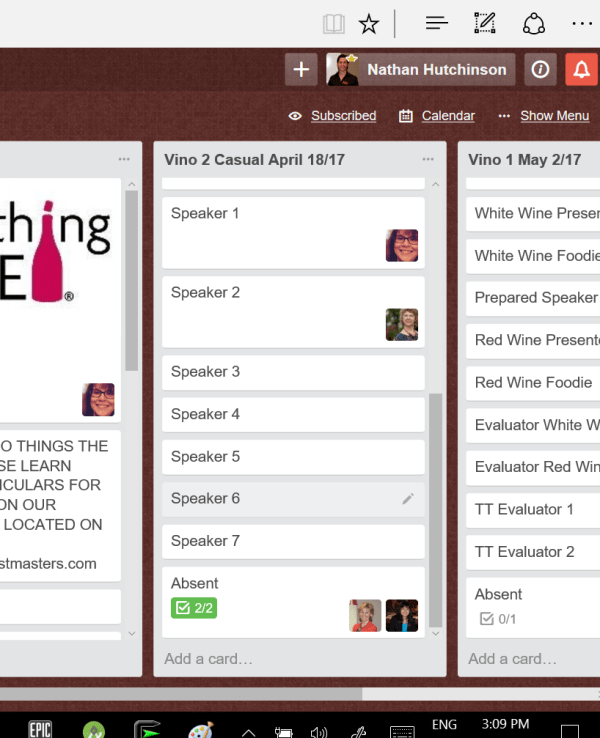
figure 13
Tutorial 3 Part 2
Click on the card in which Bev’s signed up for, this will take us to the back of the card (figure 14).
First, take notice at the bottom of the card (1). There’s a bunch of stuff happening! That right there, is known as the activity list. Every card has one, every list has one, and every board has one. This is how we keep track of what everyone is doing on Trello. So, there’ll be no misbehaving!
What we have to do, if we want to really soup up Bev’s handy work, is click the Edit the description… button (2).
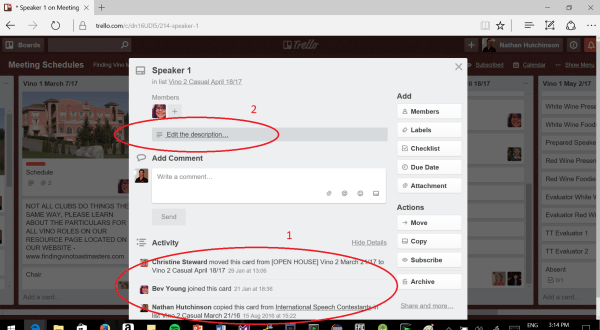
figure 14
Wow, look at all that helpful information (figure 15)! We have the title of Bev’s speech, the manual she’s speaking from, the project number, the time! She’s even included her objectives! Holy moly, what a Toastmaster! When you sign up for a speech, see if you can match the thorough quality of Bev’s write up!
After you’ve written down all the information a Chair could possibly desire, click save.
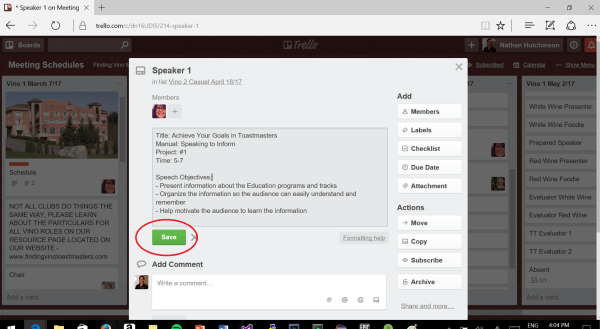
figure 15
Look at that (figure 16), it’s set in stone for future reference. Nice! Now the chair has all the info he/she needs, and Vino has a record of Bev’s achievements. Man, Trello really is amazing, don’t you think?

figure 16
Hey, we’re not done yet!
Let’s go above and beyond. Click Checklist on the right (figure 17).
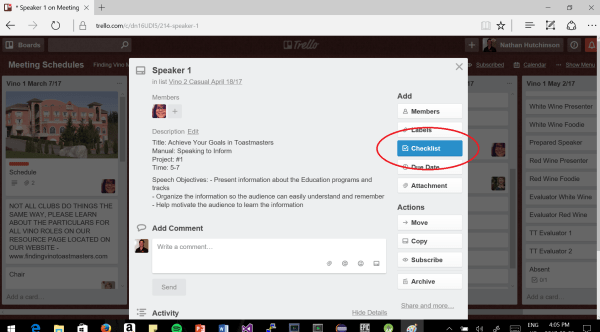
figure 17
Woah, what do we do now?… Hmm, let’s try clicking Add! (figure 18)
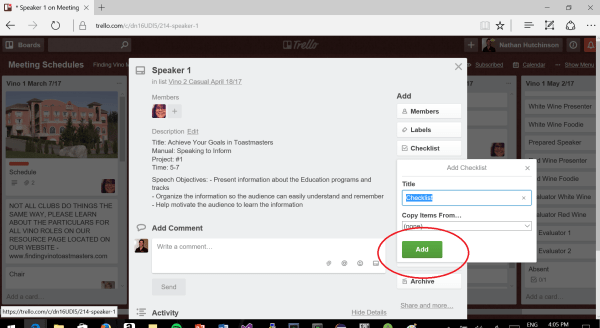
figure 18
This part is a synch, type in the item you want on your checklist, and then click add, then type the next item, and then click add, again! (figure 19)
Typically, Vino protocol dictates 2 items as default:
Number 1: add info to the card (1).
Number 2: email intro to chair (1).
Now that we’ve done that, let’s click Add and see what happens. I mean, ANYTHING could happen!
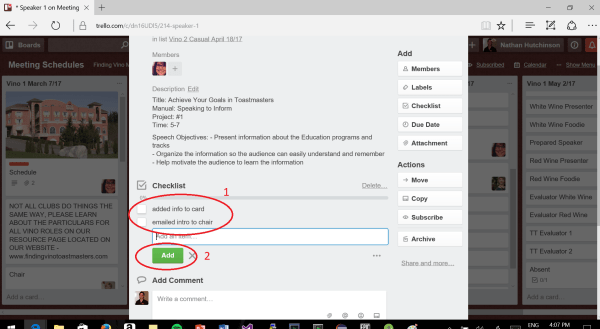
figure 19
Oh, look at that, the checklist is complete. And since we’ve added info to the card, we can check off the first item. Ahh, rewards! (figure 20)

figure 20
Now, let’s shout out to Bev, who did such an awesome job filling out her speech info. (figure 21)

figure 21
Click send and the comments completed. She’s gunna love that one! (figure 22)

figure 22
That’s it!
Now you know EXACTLY how to sign up for roles and speech projects. Furthermore, you now how to do it RIGHT!
If it seems complicated, remember, signing up itself is only those 4 easy steps. Adding speech info and the checklist is extra, helpful, but extra.
Anyways, can’t wait for the next tutorial!


